Web Stuff 10.09.2015 6318
Welcome to our last part of how to install Virtualmin/Webmin on Ubuntu 14.04.
In the last part we will cover how to setup your Nameserver, domain, email and SSL certificate.
Now before we go any further in Virtualmin we should setup our Nameservers and Reverse DNS.
When you started with part 1 you had to get a domain name, now you will need it!
Login to your domain registrar we have used namecheap and go to manage domains. Click on the domain you have used for setting up your server and click on the left menu on Nameserver Registration. Get the IP Address from your server (you will find the IP in the dasboard of digitalocean or vultr) and enter it in ns1 and ns2. With vultr you can purchase a second IP Address which you can use for ns2, which is better but not necessary. After adding the nameservers you done with namecheap.
Head over to the dashboard of digitalocean or vultr and add the hostname of your server in the Reverse DNS section for IPV4 and IPV6.
Now both the reverse DNS and nameserver update will take a couple of hours but you can keep going with Virtualmin.
First login into your dashboard with your browser and go to:
Virtualmin - Create Virtual ServerIn the form you enter:
Domain Name: mail.yourdomain.com
Description: Mail Domain
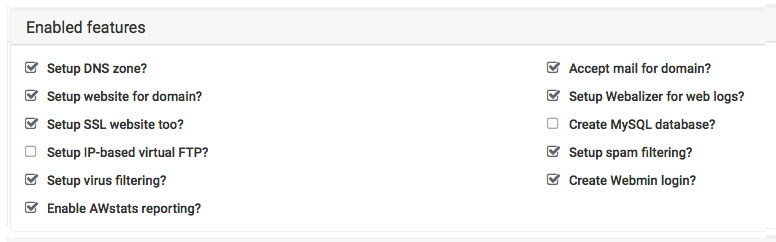
Password: something strongGo to the register Enabled Features and make sure following options are activated:

Click Create Server and wait till it has been created. We will use this later for any email address created on your server with any domain you use, this way we only need one SSL certificate for SMPT and POP/IMAP, sweet.
Before we go on with the SSL certificate create your virtual server with your domain which you will run the website and emails later. You know now how it works, the only different is the enabled features:
Create the server and go to:
Virtualmin - Choose your created Domain - Edit Mail Aliasesit should look like this:
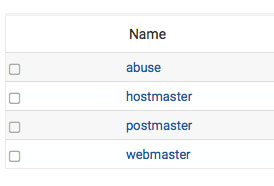
Before we can order the SSL Certificate we have to make sure that the email is going into your inbox (means that DNS is set correctly and updated around the globe). Send an email to webmaster@yourdomain.com.
Now go to:
Webmin - Servers - Read User Mail - Find the account (usually yourdomain.com)If your test email is there, we ready to purchase a SSL certificate, if not try again in an hour or two.
For the SSL Certificate I always use SSLs.com very nice and super cheap. To secure our email traffic, you remember the first virtual server we have setup, you can purchase the Comodo PositiveSSL Certificate, 15 USD for three years!
To order a certificate we need a key, go to:
Virtualmin - Choose the domain mail.yourdomain.com - Server Configuration - Manage SSL CertificateGo to the tab Create Signing Request and enter following information:
Server Name: mail.yourdomain.com
Email Address: Something that does not exist on the server
City or locality: well your city
Country Code: your country code
You can fillout all other fields as well but it is not mandatory.
It is time to go to ssls.com and get the certificate. It is fairly easy, copy/paste the key you got from the signing request (remember not the private always the public) and choose email validation, choose the email address webmaster@yourdomain.com. You will receive three emails, the first one is to validate your domain, the other two will contain the certificate and come after the domain has been validated.
When you received the certificate it will look like this after unpacking the zip archive:
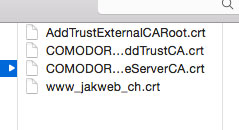
Of course the naming of the last one will be different. You will first need the mail_yourdomain_com.crt, go to:
Virtualmin - Choose the domain mail.yourdomain.com - Server Configuration - Manage SSL CertificateClick on the tab Apply Signed Certificate, choose upload file browse through your local machine to your saved certificates, select mail_yourdomain_com.crt (could be named differently) and press Install Now.
First certificate has been installed now but we also need the other three (mainly for mobile browsers (Android) and older browser) so we won't get an SSL error.
Now this step is a bit more complicated. Create a new file in a text editor and call it: mail_yourdomain.ca-bundle
Copy the content from each file we did not use in reverse order into your newely created bundle file. Save the bundle file and go to:
Virtualmin - Choose the domain mail.yourdomain.com - Server Configuration - Manage SSL CertificateGo to the tab Ca Certificate choose upload file and select your bundle file, press Save Certificate. The last step in the first tab is now to copy the certificate to dovecot and postfix.
Congratulation you have setup your secure web/email server, your first domain and purchased your first SSL certificate. Now to prevent emails going into spam you should do one last step go to:
Virtualmin - Email Messages - DomainKeys Identified MailPress Save and you are ready to go!
Your domain will also be available by now, just enter the domain name in your browser and you should see a welcome page, you can use any FTP client to upload your files and folder, add more email addresses in virtualmin, create a database and more virtual servers with even more email addresses and databases.
For sending emails with vultr or digitalocean you need to open port 25. You will need to open a ticket and ask them to open port 25, you have to agree that you won't send any spam and reboot your server once through the dashboard of vultr or digitalocean. Done!
How to fix invalid Locale Settings
Via SSH open with root:
nano /etc/environmentand add at the end:
LC_ALL="en_US.UTF-8"
Logout and login again and it should work fine.
I hope you enjoyed this series of how to install Virtualmin on Ubuntu and if you have any feedback or suggestion, please use the comments below. Thanks for reading

Release date: 07.02.2024
PHP 8.3 ready, ChatGPT improvements and much more...
Release date: 13.02.2024
PHP 8.3 ready, ChatGPT, improved language files and bug fixes.
Release date: 02.04.2024
Improved ChatGPT, File upload better security, front end editor.
Release date: 20.02.2024
PHP 8.3 ready, ChatGPT improvements, bug fixes.
We program modern and fast web and mobile software, always responsive and mobile first! Not just great software also world class support, rated an average of 4.9 out of 5 stars! When you need support from us you will get it!
Feel free to contact us via our contact form at any time, we usually respond in less then 24 hours or start a chat conversation when we are online.